Yes, you can absolutely use bathroom wallpaper — but with caveats. The question isn’t “can I?”, it’s “where and which type?”. A standard decorative paper stuck next to the shower won’t last five minutes: give it a fortnight and it’s already curling at the corners. The secret is choosing the right zone and the right material. And that’s precisely where most people get it wrong.
Here’s the practical breakdown: which bathroom wallpaper waterproof options actually hold up, where you can confidently put them, and how to protect them so they’re still looking good when you have guests round.
Waterproof Bathroom Wallpaper: Does It Really Handle the Humidity?
The enemy of wallpaper isn’t direct water — it’s the relentless ambient humidity and constant temperature changes. Every time you have a hot shower, the room fills with steam, the walls sweat, and that vapour seeps through any poorly sealed joint. Standard paper absorbs all of that moisture, swells, and the adhesive gives way.
Modern papers made specifically for wet rooms are a different story. Vinyl and washable wallpapers have a protective coating that repels water and can be wiped down with a damp cloth. Decorating a bathroom is not the same as decorating a bedroom, and using the wrong paper is money straight down the drain. Look for the water-resistance classification that manufacturers specify; suppliers like Porcelanosa already offer wall-covering collections designed for exactly these environments.
A word of caution: Spain’s Technical Building Code (Código Técnico de la Edificación, CTE — the national regulation governing construction standards) states that a properly designed bathroom needs adequate ventilation to evacuate steam. If your bathroom doesn’t ventilate properly, no wallpaper — however good — will survive long. Sort the extractor fan first, then worry about the wallpaper.
The Zones: Where It Works and Where It Doesn’t
Not every part of a bathroom is equally harsh. We split it into three zones based on how much water each area receives.
| Zone | Wallpaper? | Recommendation |
|---|---|---|
| Inside the shower / bath | Absolutely not | Tiles, microcement or large-format porcelain |
| Splashback behind the basin | Only vinyl + protection | Washable vinyl or a transparent panel in front |
| Dry wall (far end, behind the toilet) | Yes, no problem | Any bathroom-grade wallpaper |
| Ceiling | Yes, with care | Vinyl — keep an eye on rising steam |
The rule is simple: the further from water, the more creative freedom you have. The wall opposite the door, the one behind the toilet or the feature wall at the far end are all perfect for a bold pattern. Inside the shower? Don’t even think about it. That’s the territory of tiles or microcement — seamless and fully waterproof.
A Trick That Actually Works
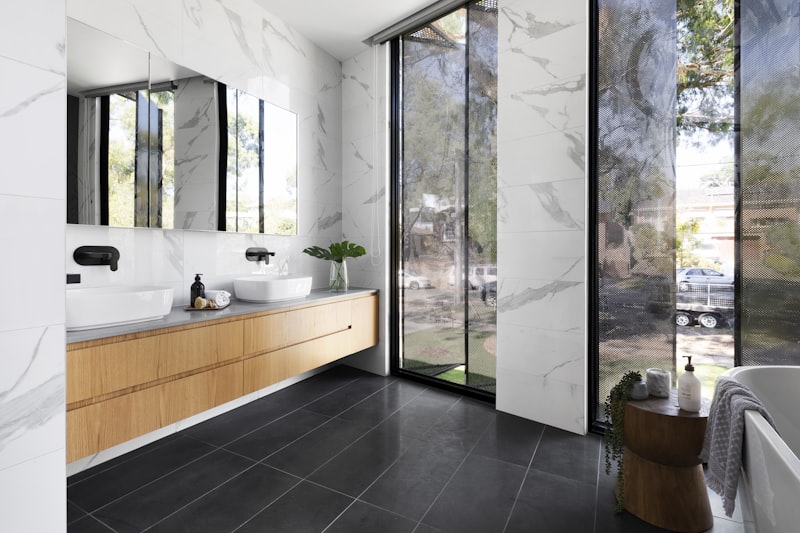
If you want wallpaper on a wall close to the basin, fit a clear glass panel over the splashback zone. It protects the paper without breaking up the visual. It’s the same trick used in those envy-inducing bathrooms all over Pinterest: striking wallpaper behind, glass in front, clean result.
Types of Waterproof Wallpaper for Bathrooms
Not every paper is up to the job. These are the ones that genuinely work in a bathroom:
- Vinyl. The gold standard for bathrooms. It has a PVC coating that repels water and steam, wipes clean with a damp cloth, and is what we recommend in almost every case.
- Washable. Tolerates gentle cleaning but handles less humidity than full vinyl. Fine for well-ventilated bathrooms and walls well away from water.
- Non-woven (TNT). A stable base that doesn’t swell as easily. Usually combined with a vinyl finish. Straightforward to hang and just as easy to remove.
- Self-adhesive vinyl (peel-and-stick). The no-fuss option. Handy for rented flats or for testing a look without committing to a full fit-out — but it’s not the most durable long-term solution.
What doesn’t work: natural-fibre papers, untreated paper-based wallpapers, and anything marketed as “decorative wallpaper” for living rooms. Looks brilliant in the shop; disaster in the bathroom.
How to Protect It So It Lasts
This is the bit most people never hear. Picking the right paper is half the battle; the other half is installation and protection.
- Dry, sound walls. If there’s existing damp or mould behind the wall, wallpaper won’t fix it — it’ll make it worse. Tackle the source of the damp before anything else.
- Moisture-resistant adhesive. Not standard wallpaper paste. Anti-mould adhesives are formulated to cope with steam. They cost a little more and are worth every euro.
- Sealed edges. The joins and corners are where water gets in. A bead of clear silicone where the paper meets the tiles or worktop makes a huge difference to how long it lasts.
- Clear protective varnish. Water-based polyurethane varnishes create a washable, water-resistant layer over the top of the paper. We recommend this whenever the paper sits in a semi-exposed position — it effectively turns any paper into an armoured version of itself.
- Proper ventilation. Worth repeating because it matters most: without a decent extractor fan or a window that actually opens, even the finest paper will eventually give up. Here’s our guide on how to ventilate a bathroom properly.
Our Honest Take
We’ll be straight with you: we love wallpaper in bathrooms when it’s used sensibly. A single wall with a botanical print or geometric pattern gives a bathroom a personality that tiles alone rarely achieve. It’s one of the few options that can genuinely transform a dull bathroom without a major budget.
That said, we’ve seen far too many bathrooms in Valencia where poorly fitted wallpaper looked like a soggy sticker within six months. Wallpaper isn’t a shortcut that avoids proper renovation work — it’s a decorative finish that needs the right zone and the right protection. Treat it properly and it’ll last years. Force it into the shower and it’ll last one season.
If you want a strong visual statement with less risk, sometimes a bathroom in deep, dark tones — matte black, forest green, navy — delivers the same dramatic impact without any dependence on steam management.
How Much Does It Cost?
Quality vinyl wallpaper for bathrooms typically runs between €30 and €60 per m² for materials, with labour on top. Compared with retiling an entire wall, it’s cheaper and faster. The catch: if it’s done badly and needs redoing within a year, that bargain evaporates quickly. The real economy is getting it right once.
If you’re thinking through a full bathroom renovation and wondering how wallpaper fits into the overall budget, take a look at our renovation cost calculator for a rough idea before you request a quote.
Frequently Asked Questions
Can I put wallpaper inside the shower?
No. However waterproof the paper claims to be, inside the shower means continuous direct contact with water. Only tiles, large-format porcelain or properly sealed microcement will hold up there. Wallpaper belongs on dry walls.
Does wallpaper cause damp or mould?
Wallpaper doesn’t create damp on its own, but if the wall already has a damp problem, paper will trap it and accelerate mould growth. That’s why it must go onto a dry wall, fixed with anti-mould adhesive and backed by good ventilation.
How long does bathroom wallpaper last?
A properly fitted vinyl paper, on a dry wall in a well-ventilated bathroom, can easily last eight to twelve years. Poorly fitted or in a wet zone, it sometimes doesn’t make it past the first year.
Can I hang bathroom wallpaper myself?
Self-adhesive vinyl is genuinely DIY-friendly. Standard vinyl with paste requires more skill — particularly the edge sealing, which is where the difference between a professional and amateur finish really shows. If you’re unsure, it’s worth having it hung by someone who does it every day.
Is wallpaper a good idea in a rented flat?
Yes — one of the best options, actually. Peel-and-stick vinyl comes off without damaging the walls and transforms a bathroom for very little money. For a rental property it’s a smart move all round.
In Summary
Bathroom wallpaper works — but it plays by its own rules: waterproof vinyl, dry walls away from direct water, anti-mould adhesive, sealed edges and ventilation that does its job. Follow those rules and you’ll have a characterful feature wall for years. Skip them and you’ll be redoing it before the year is out.
If you can picture the bathroom with that one striking wall but aren’t sure where to put it or how to protect it, let’s talk it through. At Reformarte we’ve been doing bathroom renovations in Valencia for years and we know exactly what holds up — and what doesn’t — in every corner of every type of bathroom in the region. Tell us about your space via contacto and we’ll work out the details together.